How to connect Coinly Cloud
Follow these simple steps to connect your Binance account and let Coinly work for you.
Stablecoins only. Binance only.
Coinly operates with stablecoins only — USDT / EURI / USDC / TUSD — on Binance. We monitor markets 24/7 and convert one stablecoin into another when it benefits your balance: buy slightly cheaper, sell slightly higher.
USDT
→
EURI
→
USDC
→
TUSD
→
USDT
Automated market monitoring
Create a Binance Sub‑Account
You can use your main account, but we strongly recommend creating a dedicated Sub‑Account for Coinly Cloud. It keeps things clean and safer to manage.
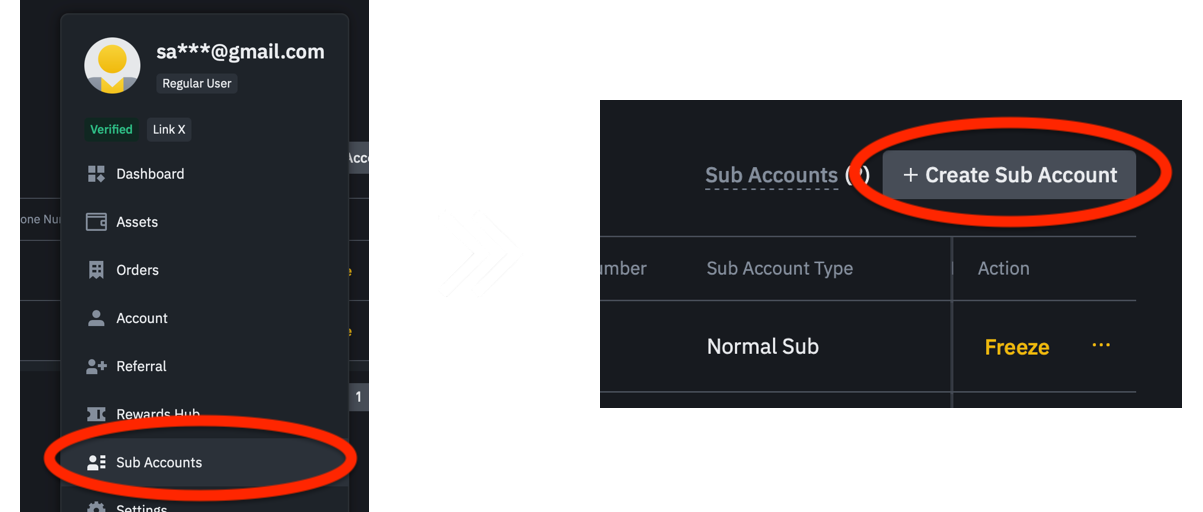
Binance Profile → Sub Accounts → Create Sub Account
Create an API key
Generate an API key for your Sub‑Account. Choose “System generated”, select your Sub‑Account, and enter any label in “API Key Label”.
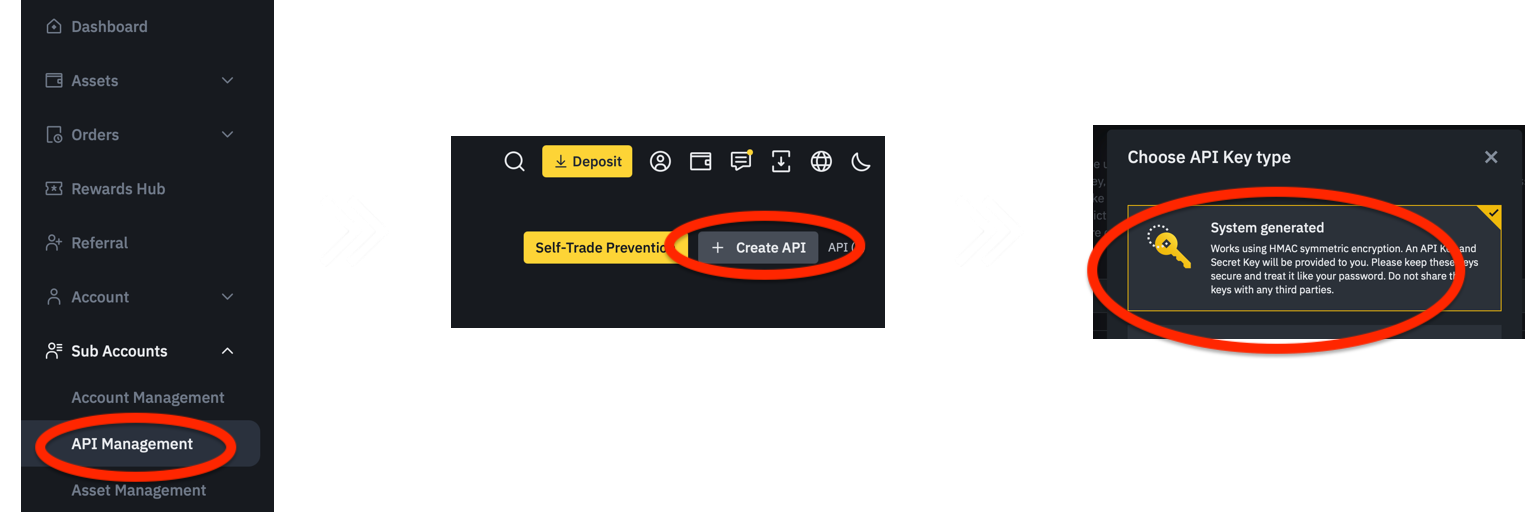
API Management → Create API → System generated → API Key Label (any title)
Set permissions and trusted IP
Select “Enable Spot & Margin Trading”. Turn on “Restrict access to trusted IPs only (Recommended)”, and add our server IP: 35.205.150.152
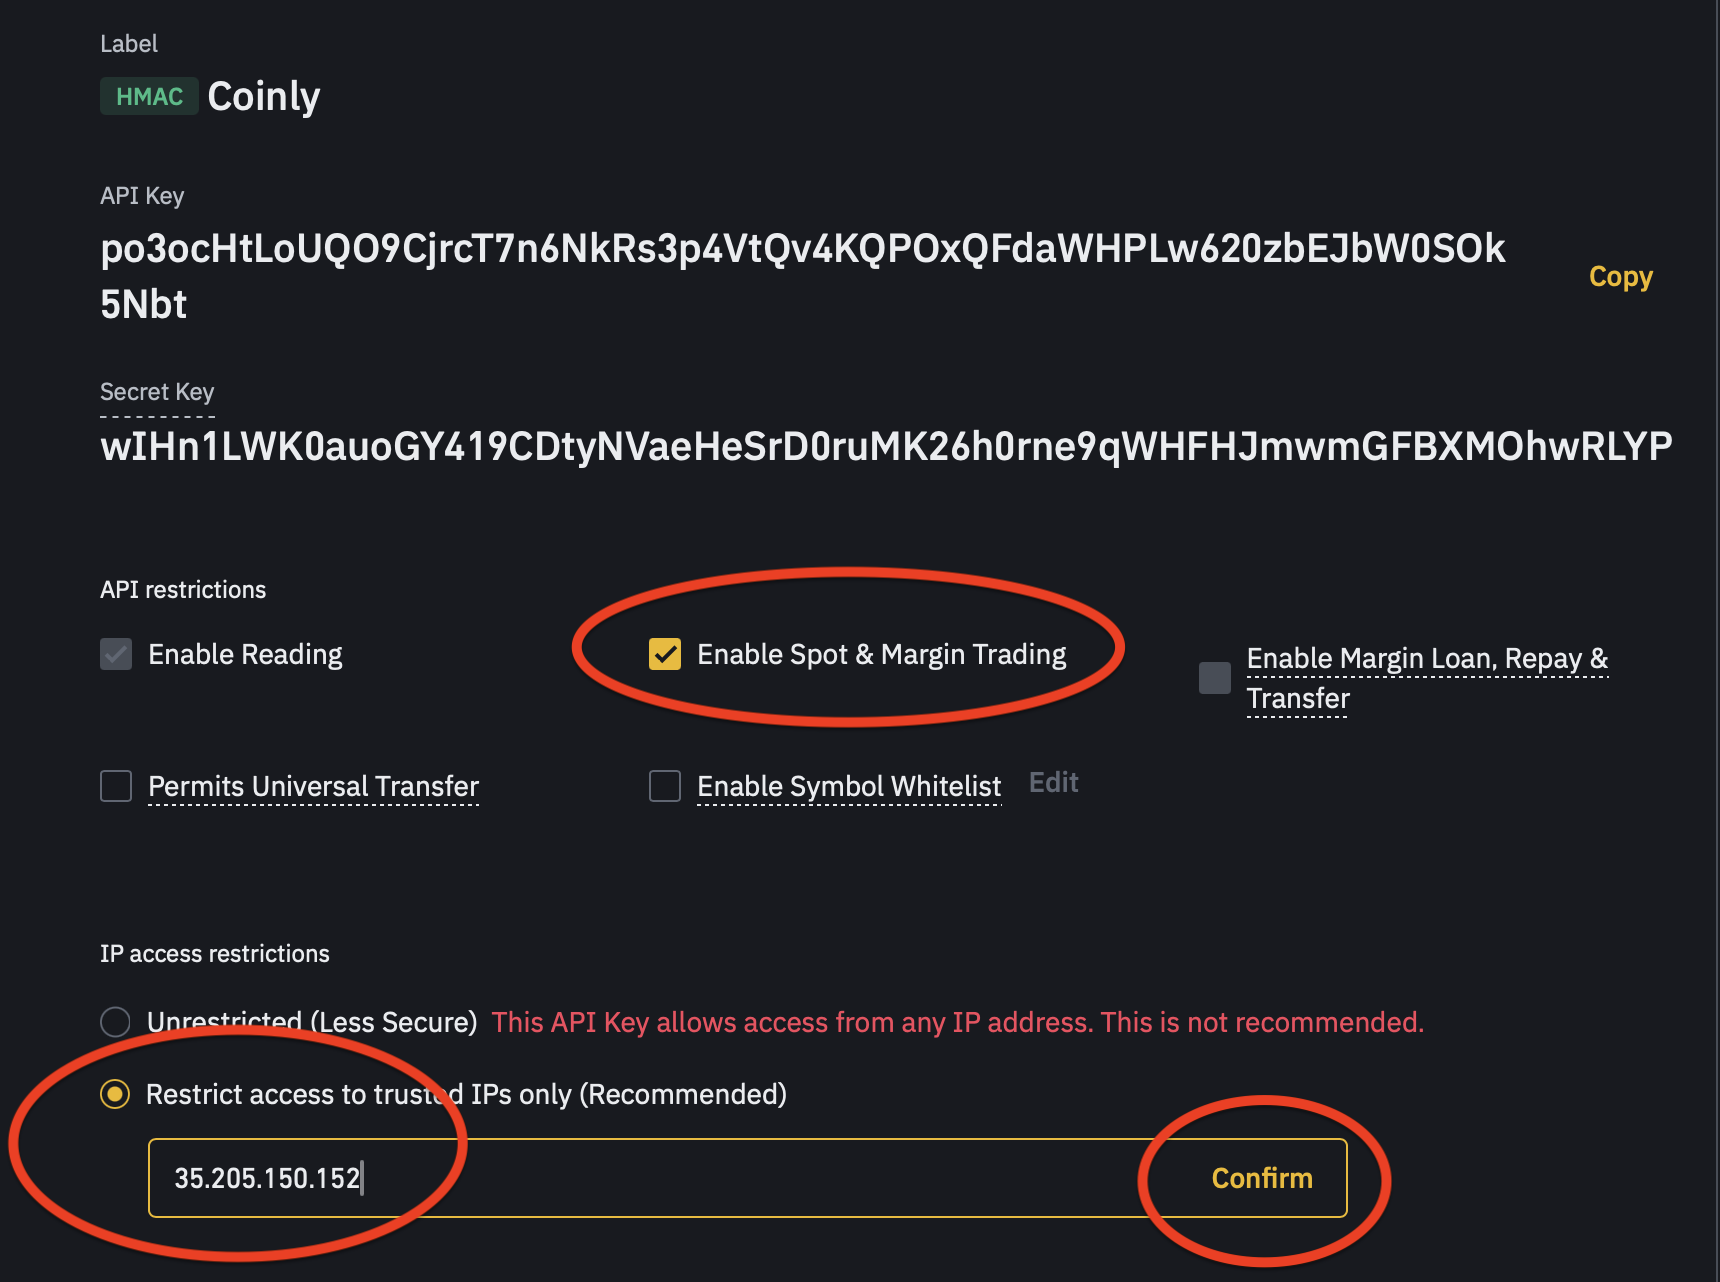
Permissions: Enable Spot & Margin Trading • Trusted IPs: 35.205.150.152
Paste your API credentials
Copy your API Key and Secret Key from Binance and paste them below. We use API‑only permissions — no withdrawals.
Your keys are encrypted and stored securely. You can revoke them anytime in Binance.
Top up your Sub‑Account balance
Go to Sub‑accounts → Asset Management, pick your Sub‑Account and click “Transfer In”. Move the amount you want Coinly Cloud to manage. Supported balances: USDT, USDC, EURI, TUSD. After funds arrive, Coinly starts working automatically.
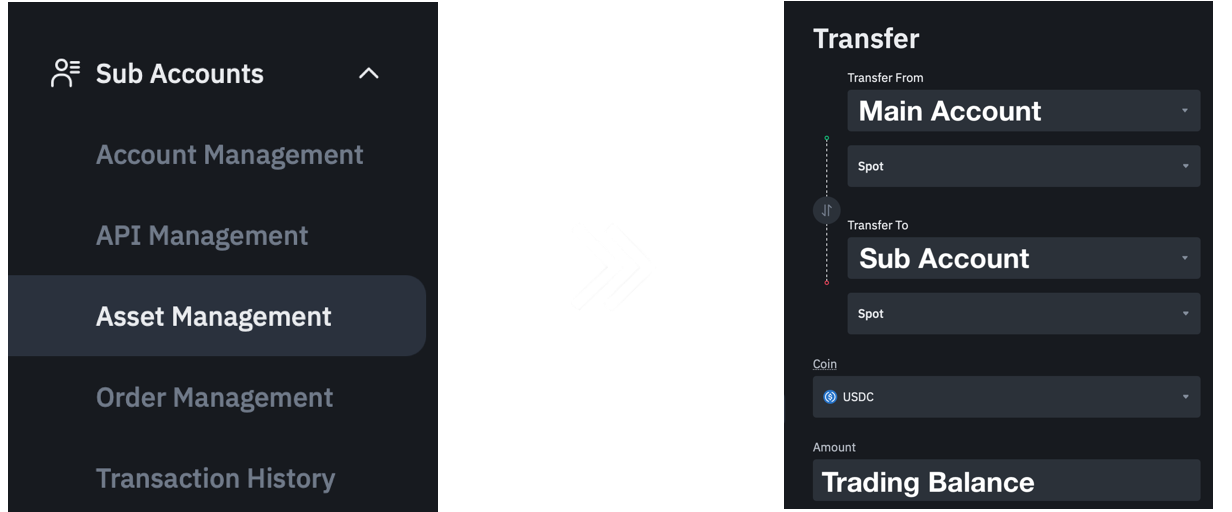
Asset Management • Transfer In • Choose amount